Everything you need to know about iron-on and sew-on patches.
We are always impressed at the ingenious places where our customers plan to put their patches – as well as being a great way to individualise a denim jacket or rucksack, patches look great on sweatshirts, hoodies, t-shirts, dryrobes, kit bags, towels, swimming costumes, bandanas, blankets and dog harnesses! Where will you put yours?
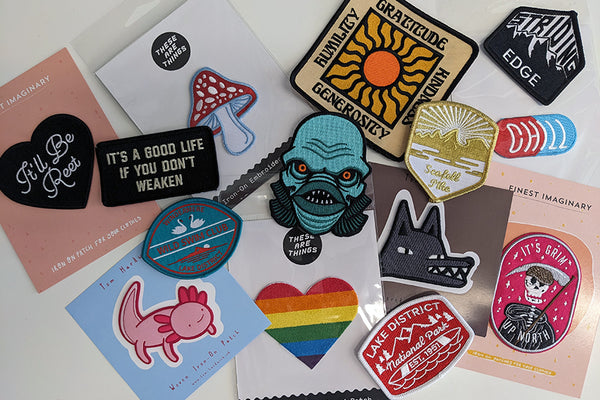
We have a huge range of patches both online and in our Windermere store: everything from souvenir patches of those mountains you just climbed to cute patches of your favourite animal – and some patches that are just so cool that you won’t be able to wait to show them off!
So how do you go about fixing your patches to wherever you have chosen to place them? We stock two different kinds of patch here at the National Park Print Shop: iron-on and sew-on. And the clue is in the name as to how you use them! Iron-on patches have a glue backing that is activated by heat, sticking them to your material. Traditional sew-on patches are sewn to your material using a needle and thread. Iron-on patches can also be sewn to your material. If you’re going to be washing a garment or it will get lots of wear then it’s a good idea to add some stitches to an iron-on patch too.
How to sew on a patch
It’s time to get crafty! First you need to decide on the positioning of your patch. Once you are happy with its position it is a good idea to fix it in place temporarily with a couple of pins so it doesn’t move while you are sewing it. Next you need to decide on the colour of thread – one that matches the patch or a contrast thread that will really pop! Now it’s time to sew on your patch.
- Thread your needle and tie a knot (or two) in the end so that it doesn’t pull back through your material and the patch.
- Start sewing from the back of the material so that the knot and loose ends of thread are hidden.
- Either sew close to the edge of the patch or over the bound edge of the patch.
- When you have finished sewing make sure your last stitch finishes on the underside of your material. Tie a knot in the thread.
How to iron on a patch
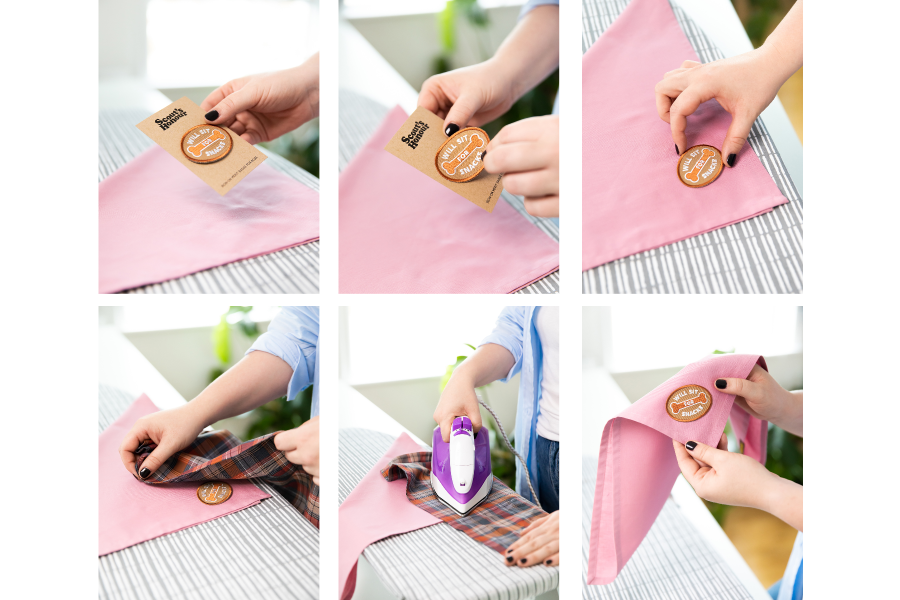
Iron-on patches have an adhesive backing that allows them to be fixed on without sewing – great if you aren’t the craftiest person in the world! You can tell if your patch is iron-on if it has a shiny or filmy layer on the back. Patches can be ironed on to a wide range of materials, but be careful if your material is heat sensitive – it is probably best to sew a patch on to your favourite leather jacket rather than risk damaging it with an iron!
- Make sure the back of your patch is clean and free from dust or fluff.
- Position your patch in place.
- Cover the patch with a piece of fabric.
- Use the heat care tag of your garment to choose a suitable heat setting of your iron – just remember not to use the steam setting as hot water will stop the glue sticking!
- Iron on. Start from the middle of the patch and move the iron outwards. Remember that all the glue needs to fully melt for the patch to stick properly to the material.
- Let the patch rest for a few minutes for the glue to fully bond.
Now you are ready to go! Show off your patches secure in the knowledge that they are safely affixed. Here are just a few patches from our collection for some inspiration.